In this article, you will learn about hundreds of Linux Commands with Examples. Well, What is a Linux Command? Do you know the definition of Linux Command? Let me tell you, A Linux command basically consists of Linux’s Program name followed by options and arguments. A Linux command is always Run on a Terminal also known as Command Line Interface.
In some Linux Interface like KDE Plasma Terminal is known as Konsole.
This article is written for every Linux user no matter which Linux distro you use. You can run Given Linux Commands on almost every Linux Distribution.

Table of Contents
Before You Learn Top Linux Commands
Before you started learning top Linux Commands you should know the basics of Linux if you have some experience of Linux and already know the basics you can skip this part.
What is Distro in Linux?
Linux is totally configurable and the Linux operating systems Include thousands of different programs for different tasks. As a result, Many organization has created different and different varieties of Linux for different needs.
Suppose, you are a penetration tester and your friend is a Web Application Developer and you both want to use Linux for your Job. By keeping this in mind organizations have created different variants of Linux and it is known as distributions of Linux.
Like for web development, the developers can use Ubuntu and for Penetration testing penetration testers can use Kali Linux.
What is $ in Linux?
What is $ sign in Linux? Let me explain- Before you can type and run any command in Linux you will have to wait for the shell to display $. The $ is called prompt in Linux.
What does prompt mean?
Basically, It means ‘I am waiting for your next command’.
However, Users can configure shell and can change the prompt’s shape and size. Like, You can change the prompt of your shell from a dollar sign to a complex string of text containing your computer name or username with signs.
example:
$ myhost: ~dips$But these prompts mean the same thing: The Shell is Ready For Your Command.
10 Most Useful But Basic Linux Commands
Before you started learning advanced Linux commands you need to get feel for Linux. So, let’s start with these 10 basic Linux Commands.
Open your terminal and start running the following commands
- Linux Command to Display Current Month’s Calendar-
$ calWhat if you want to Display the Calendar for June 2021? Well, you will have to run the following command-
$ cal Jun 2021Output:

2. Linux Command to Get a List of Commands That are Used in Linux
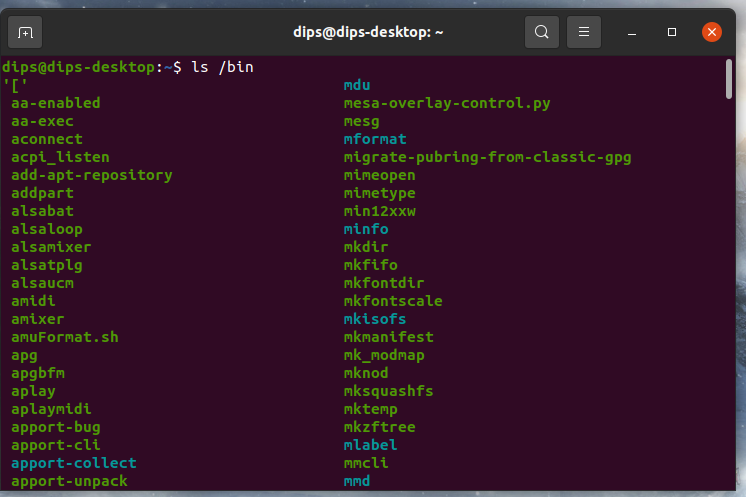
On your Linux machine, there is a bin directory that contains a list of Linux Commands. By running the given command you can get the list of contents in the bin directory-
$ ls /binOutput:
3. Linux Command to Get the Number of Items in Your Home Directory-
ls $HOME | wc -lOutput:

4. Linux Command to Get the information about the partition of your Hard Disk-
$ df -hOutput:

5. Linux Command to Watch the Processes Running on Your Computer-
In order to watch the processes running on your computer run the following command-
$ top -d1Output:

6. Print Name and Address of Your Computers on Paper Using Printer Machine-
Run the following command:
$ lpr /etc/hostsOutput:
You will get the output on paper.
7. How long you have been Logged in (Linux Command)-
By running the following command you can check ‘How Long You Have Been Logged In”. Basically, It displays the time when you turned your system on.
$ last -1 $USEROutput:

8. Linux Command to Download a File from the Internet
Suppose, you want to download a PDF file from the Internet then you will have to run the following command on your terminal.
$ wget url/filename.pdfExample-
$ wget https://kali.training/downloads/Kali-Linux-Revealed-2021-edition.pdfOutput:
After running the given command, The Ebook of Kali Linux Revealed will be downloaded into the home directory of your system.

9. Linux Command to Get the Your IP Machine’s IP Address
Run the given command on your terminal in order to get the IP address of your Computer-
$ ip addr show eth0Output:
The output will be like this-
inet 192.156.1.8910. Linux Command to Check Who is The Owner of a Domain Name
Using whois utility you can check who is the owner of a domain name. But before you run the command followed by a domain name you need to check if whois utility is either installed on your system or not.
In order to check it, run the following command-
$ whoisif you get the following error-
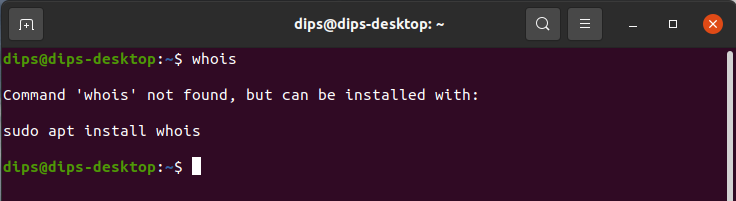
Then run the following command:
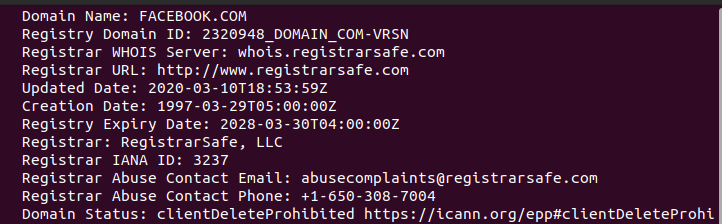
$ sudo apt install whoisOnce whois utility gets installed on your system then run the following command-
$ whois facebook.com | lessOutput:
Linux Commands for File & Directory Operations
No matter what operating system you use, but file management is one of the most basic things that you will have to always perform. But managing files on Windows or Mac Machine is easy, on the other hand, file management on Linux could be tough when you don’t know Linux Command for File Operation.
However, Linux users can also use GUI to manage files But if when you deal with a Linux server without any GUI then you will have to use Linux File Management Commands in order to perform operations on the files.
Basic File Operations
- ls – Lists files in a directory.
- cp – Copy file.
- mv – Rename or move a file.
- rm – Delete (remove) a file.
- ln – Create Links to file
Directory Operations
The directory is the place where users place their files. A directory is like a container that contains files or sub-directories. In order to deal with directory operations, you need to know the following commands-
- cd – The cd command is used for changing the directory.
- pwd – The pwd command prints the current working directory.
- basename – The basename command prints the final part of a file path.
- dirname – The dirname command prints a file path without its final part.
- mkdir – The mkdir command is used for creating a directory.
- rmdir – The rmdir command is use for removing an empty directory.
- rm -r – The rm -r command is used for removing a directory and its contents.
Learn How Rename Directories on Linux Using Command
Here is a complete article about removing directories in Linux using the terminal- How to Remove a Directory in Linux.
Linux commands for viewing files
Sometimes, while using Linux you will encounter files containing readable text or binary data. In such a case, you will have to open such files in a readable manner. So, in order to open files in a readable manner, you should know the following given commands-
- cat – By running the cat command you will be able to view the file in its entirety.
- less – View text file one page at a time.
- nl – View file with line numbering.
- head – View the first line of the text file.
- tail – View the last line of the file.
- string – string is used to text that’s embedded in a binary file.
- od – View the data in octal.
Linux Commands for Creating and Editing Files
In order to create or edit a file on your Linux system, you will have to use text editors like nano or vim. Popular Text Editors-
| Text Editors- |
| Nano – Nano is a popular text editor which included by default in most of the Linux distros. |
| Emacs – Emacs is also a text from FSF (Free Software Foundation) |
| Vim – Vim is another very popular utility for editing text files. |
Create a file in Linux using nano:
$ nano myfileCreating a file in Linux using Emacs:
$ emacs myfileCreating a file in Linux using vim:
$ vim myfileLinux command to create files quickly
Imagine if there is no text editor installed on your machine, then how would you create a file quickly? Not a big deal, by using the touch command you can create a file so quickly-
$ touch newfileBy running the above command you will be able to create an empty file.
However, we have a separate post about creating files in Linux- How to Create Files on Linux
Set your Default Editor
While using Linux and performing tasks on your Linux Machine many programs require an editor when it is needed and usually the default editor used to be either vim or nano. But if you want to change your default text editor then you can easily do it by running the following commands:
$ EDITOR=emacs$ VISUAL=emacs$ export EDITOR VISUALFile Comparision and Packaging Commands in Linux
Linux has many powerful tools that can be used to compress files into a variety of formats and also uncompress them. The most common are gzip and bzip.
When you compress files in gzip (Zip) the compressed files are saved with .gz file extension. on the other hand, the bzip files are saved with bz2 extension.
But what about .zip extension? Does Linux support .zip format which is the common file compression extension in Windows?
Well, the answer is yes!
Linux File can be compressed and uncompressed in the following formats-
- gzip
- bz2
- zip
- xz
- lzma
- classic Unix compression format .Z
- And many more
gzip and gunzip Commands
The gzip and gunzip are used to compress and uncompress files in GNU zip format. When you use gzip command to compress a file then the compressed file will have the .gz extension.
Note: In some cases, the original file may be deleted.
Gzip command syntax:
$ gzip fileNameIf you want to add an option-
$ gzip option FileNameGunzip Command Syntex:
$ gunzip fileNameIf you want to add an option-
$ gunzip option fileNameSome Commands and options–
- gzip fileName – Compress file in .gz format. The original file will be deleted.
- gzip -c fileName – When you run this command then compressed data will be produced on standard output.
- cat fileName | gzip – The compressed data will be produced from a pipeline.
- gunzip fileName.gz – This command will uncompress fileName.gz. But the but the original fileName.gz will be deleted.
- gunzip -c fileName.gz – This command will uncompress data on standard output.
- cat fileName.gz | gunzip -This command will uncompress data from a pipeline.
- zcat file.gz – Data will be uncompressed on standrad output.
bzip2, bunzip2 and bzcat commands
If you want to compress and uncompress files in Burrows-Wheeler format then you will have to use bzip2 command to compress files and bunzip2 command to uncompress files. When you use bzip2 command to compress files in Linux then the compressed file would have .bz2 file extension.
Note: In some cases, the original file may be deleted.
Bzip2 Command Syntax:
$ bzip2 fileNameWith option-
$ bzip2 option fileNameBunzip2 Command Syntax:
$ bunzip2 fileNameSample Commands and Options-
- bzip2 fileName – This command will compress file but also it will delete the original file.
- bzip2 – c fileName – It will produce the compressed data on standard output.
- cat fileName | bzip2 – It will also produce the compressed data on standard output.
- bunzip2 fileName.bz2 – It will unzip fileName.bz2 and also it will delete original file.
- bunzip2 -c fileName – It will uncompress the data on standrad output.
- bzcat fileName.bz2 – This command will also compress the data on standrad output.
The Compress and Uncompress Command
In order to compress files in standard Unix format which is Lempel Ziv, you can use the compress command. On the other hand, in order to uncompress Unix format-based compressed files, you can use uncompress command.
The compressed files in Unix-based format are saved with .Z file extension.
Syntax:
$ compress fileNameTo Uncompress:
$ uncompress fileNameRelated Sample Commands-
- compress fileName – It will compress the fileName to create fileName.Z and the original file will be deleted.
- compress -c fileName – It will produce the compressed data on standard output.
- cat fileName | compress – It will produce the composed data from a pipeline.
- uncompress fileName.Z – It will uncompress fileName.Z to create file and the original file will be deleted.
- uncompress -c fileName.Z – It will also uncompress the data on standrad output.
- cat fileName.Z | uncompress – It will produce the composed data from a pipeline.
- zcat fileName.Z – The zcat command followed by the file name will uncompress the data on standard output.
Zip and Unzip Command in Linux
If you have ever used Windows operating systems then you must know the fact that Windows OS supports Zip format. Bun on your Linux system you can also compress files in zip format and uncompress it too.
Zip Command Syntax:
$ zip ZipFile.zip fileNameExplanation-
Here, ZipFile.zip will be created of an already existed file which is fileName.
Example-
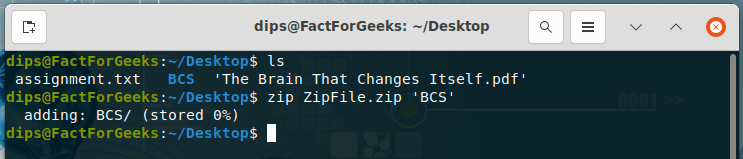
In the image, you can see, on my desktop, there is a directory named BCS. I have compress that directory with the new name ZipFile.zip. Here BCS is in quotation because it is a directory if it was a file then we don’t need to use quotation marks.
Unzip Command Syntax:
$ unzip fileName.zipRestart and Shutdown Command in Linux
We have seen some people turn off the power to their Linux machine which is not a good practice. If you are using KDE or Gnome you can use the main menu to shut down your Linux system. Or using some simple Linux commands you can reboot or shut down your Linux desktop machine or server.
We have a complete article about shutting down or rebooting Ubuntu machines.
Shutdown Command
The shutdown command is used to halt or reboot a Linux System. But the condition is only a superuser can run it. Let me give an example-
$ sudo shutdown -h +10 "scheduled maintainance"The command in the example halts the system in 10 Minutes, broadcasting the message “scheduled maintenance” to all users who are logged in.
The time may be a number of munites preceded by a plus sign, like +20; An absolute time in hours and minutes, like 12:20; or you can also you the word ‘now’ to shutdown your system immediately.
Reboot Command
There are many commands to reboot a system but the popular one is the ‘reboot‘ command and shoutdown -r command can also perform the same action.
$ rebootOr
$ shutdown -rOptions that are used with shutdown command–
| -r | -h |
| -k | -c |
| -f | -F |
- -r – Reboots the system
- -h – Halts the system
- -k – Kidding: don’t realy shutdown the system but it broadcasts the warning message to all the users that the system is to going down.
- -c – Cancel the shutdown in progress (If you fixed the time).
- -f – On reboot, skip the usual filesystem check.
- -F – On reboot, requere the filesystem check.
Disk and Filesystems
If you have been using Linux then you must know that Linux can have multiple disks or disks partitions. In casual conversation, there are also called partitions, disks, volumes, and filesystems.
A disk is nothing but a hardware device that is divided into partitions and each partition works as an independent storage device.
When you create a partition then before it can hold files, it is “formatted” by a program that writes a filesystem on it.
A filesystem defines how files will be represented; some examples are ntfs, ext3 and ext4.
Once the filesystem is created, you will have to mount it in order to make it available for use. It can also be unmounted in order to make it inaccessible.
Note:-
Disk-related operations like partitioning and formatting can be a little bit complex on Linux systems. So, you can use tools like gparted, parted, fdisk, or sfdisk.
gparted has the easiest user interface, if you want to do your task in a very simple manner; we suggest you use gparted utility.
Top Linux Commands for Disk and Filesystem
- df – The df command is use to display available space on mounted filesystem.
- mount – The mount command is use to mount the partition.
- unmount – The unmount command unmounts a disk partition.
- fsck – The fsck command check disk partition for error.
- eject – The eject command ejects CD, DVD, or other removeable disk
df
If you want to check disk size, free space, or used space of your any of disk partition then you can use df command for this purpose. df is referred to as Disk Free. When you run df command it reports on all mounted filesystems.
Syntax:
$ dfOutput:
Filesystem     1K-blocks     Used Available Use% Mounted on
udev             1483996        0   1483996   0% /dev
tmpfs             302824     1524    301300   1% /run
/dev/sda1      207621916 24769216 172236380  13% /
Mount
The mount command is used to make a partition accessible. The mount command (with option) can be used for tons of operations on the filesystem but in this post, we will discuss only the most basic uses of the mount command.
Syntax:
$ sudo mount /dev/sda1In order to use the mount command, you need to have superuser privileges. So, you will have to run the mount command followed by sudo.
umount
It is the opposite command to mount. So, the umount command makes a disk partition unavailable via the file system.
Uses of umount command- If you have mounted a DVD on your system then you can’t eject it until it is unmounted.
What if you try to unmount a file system that is in use? Well, the system will not allow you to do so for safety reasons.
Look at the syntax:
$ sudo umount driveIf you want to unmount all mounted drives then you will have to run the following command-
$ sudo umount -afsck
fsck (filesystem check) command is used to check System Disk partitions and if the command finds any kind of error it repairs also. When you boot your system the fsck gets run automatically in order to check and fix errors in the drive. But it is also possible that you can run this command manually when it is needed.
How to run fsck command? well, follow the syntax-
$ sudo fsck -f /dev/sda4But keep in mind that you can not run fsck command to fix issues with the root filesystem when your system is working fine.
eject
When we use CD-ROM or DVD Drive we have to press an open button or close button to eject or insert. The eject command in Linux is like an open button. It is always a good practice to run the eject command before you remove any drive from your system.
Syntax:
$ eject deviceNameViewing Process in Linux
When you run a Linux Program each program represents one or more processes and the Linux operating systems provide commands to view or manipulate them. Every process that is running has a numeric identification number known as ID or PID.
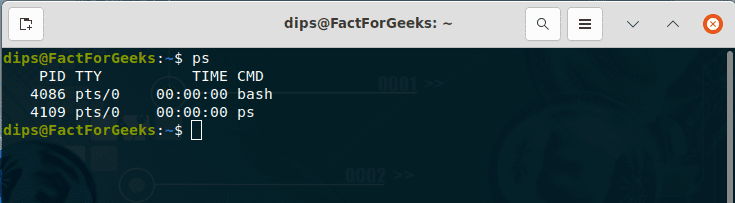
ps Linux Command for Listing Process
The ps command is used to display information about the running processes on your system. Also, by using options you can check the processes of other users.
Syntax:
$ psOutput-
With ps command, you can use almost 80 options; yes the ps command has at least 80 options. We can not cover all the options in this article but yes we will let you know about a few that are most important.
If you want to view your own processes then run the following command-
$ ps -uxIf you want to view other user’s processes like john’s processes then run the command below-
$ ps -U johnView process on terminal-
$ ps -tNView particular processes 1, 2, 30-
$ ps -p1 2, 30Linux Command for Controlling Processes
You can perform many operations on the running processes. Like, killing processes, restarting processes, stopping processes, or setting priority.
Linux Command to Terminate Running Processes
Step 1. Check Running Processes
You can check currently running processes on your machine by running some commands on the terminal. So, now in order to check running, processes open the terminal or command-line interface and run the following given commands-
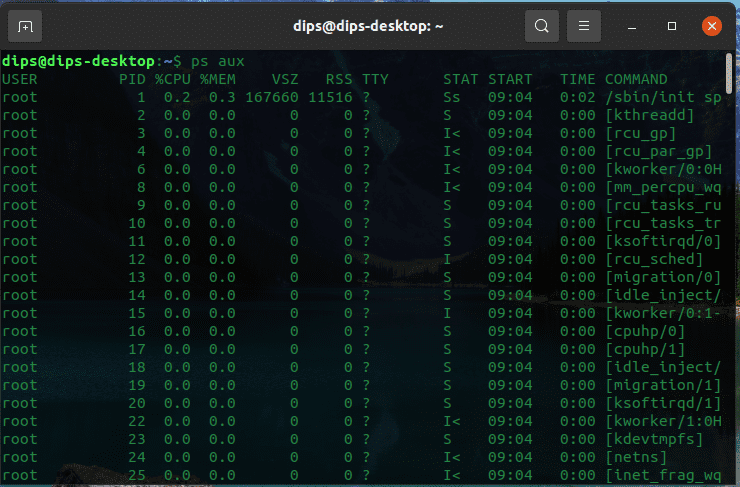
$ ps auxor
$ top or
$ htopIn order, to check currently running processes in Linux; you can use any of these commands. But if you want to use htop command then before you can run it, you will have to install htop utility.
Step 2. Get Process ID or PID
Kill Command in Linux is used to terminate running processes. Kill command sends signals to a process interrupt it, suspend it, or crash it.
In order to terminate or kill the running process, you are required to be the super-user. and you may need to have a process ID or PID.
The syntax for kill command-
$ kill [option] [PID]Here, In the syntax, you can see to kill a process; you should have process ID or PID.
How to get PID?
While checking current running processes using ps aux, ps -uax or htop command you get the PID of the running program. And also you can check the process ID or PID of any individual program by executing the following command-
$ ps -uax | grep [program]Example-
$ ps -uax | grep mozilla
Step 3. Now Run Kill Command
So now we have got PID, we can use this PID to kill the process.
$ kill -9 2282Here, -9 is the kill signal.
Or you can use killall command to kill all the processes for any given program–
$ killall mozillaUser Account Management Related Linux Commands
There could be many users of a Linux machine. Now we are going to see some commands that are used in account management.
| lognam | Print Your Login Name |
| whoami | Print Current User Name |
| id | The id command print user ID along with group membership of the user |
| who | The who command lists logged-in users, long output |
| users | Also list logged-in users, short output |
| finger | Print information about users |
| last | Determine when someone last logged in |
| printenv | Print your environment |
Linux Command to Create an Account (User Account)
You can create a user account using the terminal of your machine. useradd command is used in order to create a new user account.
But keep in your mind that only a super-user can create a new user account.
You will have to run the following command to create a new user account-
$ sudo useradd usernameLinux Command to Delete an Existing User
In Linux, a superuser can delete existing users by running userdel command. userdel command can be used for removing users as well as their files and home directory.
Run the following command to remove an existing user-
$ sudo userdel usernameIn order to delete user files as well, you will have use -r option with userdel command.
$ sudo userdel -r usernameWarning: Think carefully before you run userdel command with -r option. Make sure you have taken the backup of the user account you are going to delete. You might need the file again someday. Or Instead, you can deactivate the user account using usermod -L command.
Modifying User’s Account Using usermod command
Superuser can modify any user’s account using usermod command. A user account can be modified in a various ways like changing the home directory.
$ usermod [option] usernameDeactivating/Locking user using usermod command
In order to deactivate a user account using usermod command, you will have to use -L option with the command.
Example-
$ usermod -L username-L – option is used to lock the user account. So, once an account is locked then the user can not log in again.
Activating/Unlocking User Account
If a user account is locked then the superuser can unlock the account using usermod command with -U option.
Example-
$ usermod -U usernameLinux Command for Changing Password
Using passwd command superuser can change the password of any user. Or even, a superuser can change his own password by running the same command.
The syntax for Changing Password of another user-
$ sudo passwd usernameIn a case when a superuser wants to change his own password then the following command will be used-
$ sudo passwdConclusion
In this article, we have covered the most useful Linux commands with Examples. After going through this article, you would have learned file creation and editing, text manipulation and pipelines, Backup and remote storage, viewing and controlling processes, and user account management using commands.
And we are bound to keep updating this most informative article. We hope you got to learn a lot through this post.
If you have any questions or a suggestion then please let us know through comments.
1 thought on “Linux Commands With Examples”