If you are an Ubuntu or any other Linux distro user it is important to you to have knowledge of Network Configuration. Because you never know when you will be facing any issue with your Internet connection. And for fixing problems related to network configuration settings you should have proper knowledge about it. In this article, you will learn almost everything about the Ubuntu network configuration setting.
Let us tell you, what will you have learned after completing this this post.
- Network Configuration Through Terminal and GUI
- Setting Up Static IP addresses Through Terminal and GUI
- Proper Knowledge of Network Manager
- Changing Host Name in Ubuntu
Table of Contents
Ubuntu Network Configuration using Netplan
We are going to use the Netplan utility in order to configure the network setting in our Ubuntu Machine. Netplan was introduced in Ubuntu 17.10, we can say it is a new Ubuntu Command Line Utility that allows us to configure and manage network settings.
How to open Netplan in command Line?
It is not too hard to use netplan. In order to use netplan you will have to open a network configuration directory called netplan. You can find netplan in the etc directory of your machine.
If you don’t have idea how to open netplan directory then look at the following code-
$ cd /etc/netplan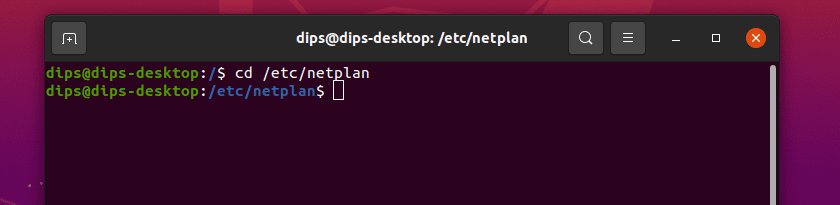
This is the directory where you will get the network configuration files.
Set static IP on Ubuntu
You have got to know about Ubuntu Command Line Utility Netplan. Now it’s time to set static IP on Ubuntu using Netplan.
Step 1: Check All the Active Network Interfaces
Before you go ahead and change network configuration settings on your Ubuntu system check all active network interfaces.
Run the following command on your terminal-
$ ifconfig -aWhen you run this command you will get the list of active internet interfaces like this-
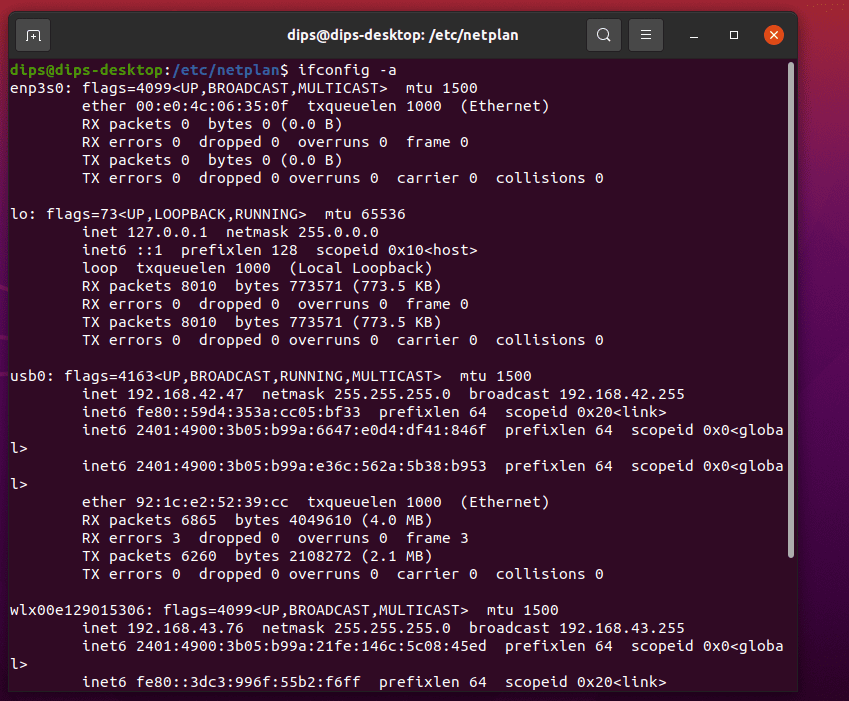
In the output, you can see there are three interfaces that are attached to my Ubuntu System other than wireless. enp3so is an Ethernet interface which is not configured and the other two are LoopBack and USB Interface. Well, I have connected my system to the internet using USB Tethering.
Step 2: Set Static IP on Ubuntu
List the files inside /etc/netplan. You can do it by running ls command.

You can see there is – 01-network-manager-all.yaml file. It is a type of netplan configuration file.
In the case you don’t find any file then run the command bellow to automatically generate yaml configuration file.
$ sudo netplan generateAfter running this command the file will be generated.
Open 01-network-manager-all.yaml file in your Favourite text editor. In my case, I will use nano. So, I will have to run the following command.
$ sudo nano 01-network-manager-all.yaml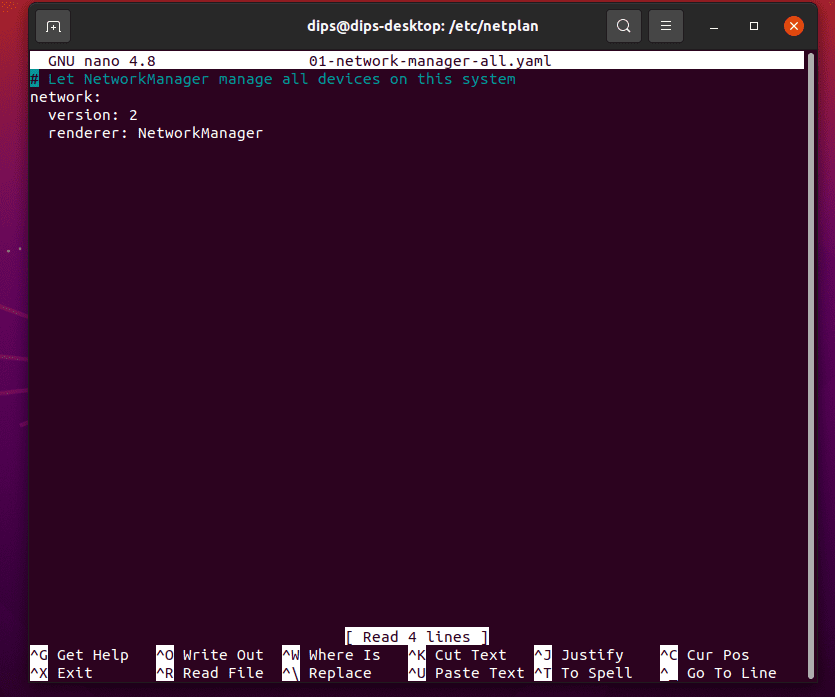
When you run given command then the file will be opened in your text editor.
Add the following code, Below the renderer:
ethernets:
    enp3s0:
      dhcp4: no
      addresses: [192.168.42.49/24]
      gateway4: 192.168.42.129
      nameservers:
          addresses: [8.8.8.8,8.8.4.4]
Note: Replace IP address and gateway IP.
You can Find Gateway IP by running – ip route | grep default command
It should look exactly like this-
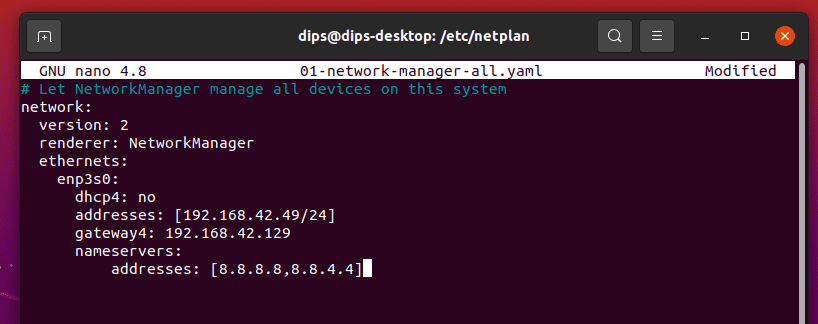
If everything is alright then save changes.
Note: Keep track of the spacing because it matters a lot in configuration files. If you misplace it, your configuration file will not be working properly.
Explanation:
Ethernets: It’s placed because you are configuring it.
enp3s0: It is my network interface name (In your case, it could be different. If you forgot then look at step 1 section again.
dhcp4: dhcp property, we will keep it no because we don’t want dynamic allocation of the IP address.
Nameservers: Here you have specified DNS server, Primary and Secondary both.
Test Configuration File:
To test configuration file run the following command-
$ sudo netplan try If the control will not find any error in your ubuntu network configuration file then you will be asked “Do you want to keep these settings?” Now hit Enter.
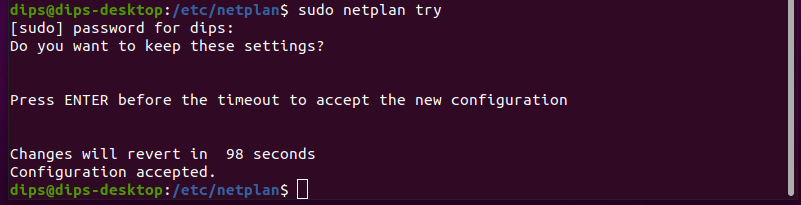
Done..
If you are facing any problem then please watch this video once-
Ubuntu Network Configuration Using GUI
If you feel changing IP address using terminal is hard then you can try GUI. On your Ubuntu Desktop/Laptop click on the start button and find the settings and open it. In settings, you will get a “Network” option in the options list, click over it.
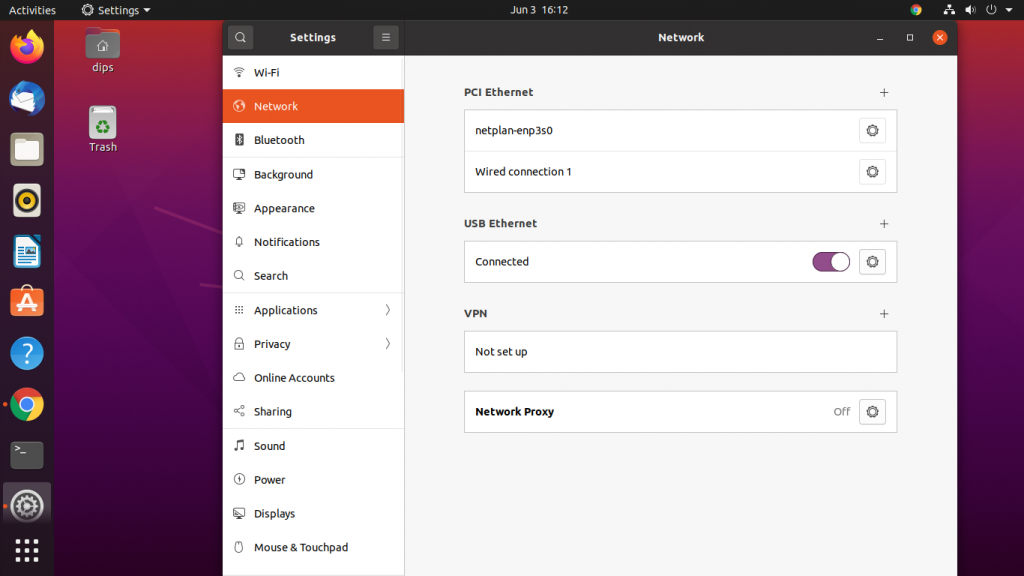
Now you can see we have 2 interfaces netplan-enp3s0 and wired connection 1; Click on the Gear Icon to open settings of the Interface.
After opening settings of the interface. Select IPv4 Section now select the “Manuel” option to assign IP address, Subnet mask and the default Gateway.
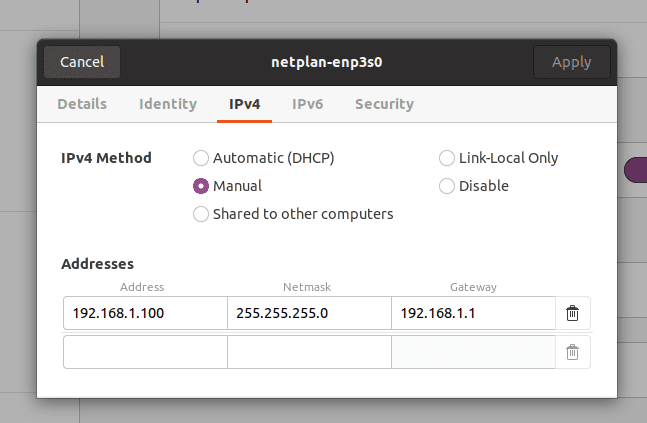
After assigning it, Click on the Apply button. and Done..
Changing Host Name
If you want to change the Host Name of your Ubuntu System then you can do it by making changes in /etc/hostname.
In order to change hostname open /etc/hostname directory in your favorite text editor. Then run the following command if you want to edit the file in the nano text editor.
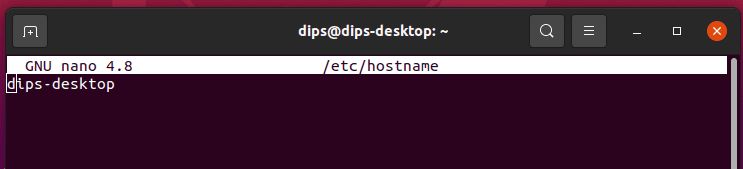
The file contains only the Host Name of your system. In my case, the hostname of my computer is dips-desktop.
You can delete the old host name and put a new one. After changing it don’t forget saving the file.
Conclusion
In this article, we tried our best to provide some depth information about setting up static IP on Ubuntu machine. We have explained, how to change Ubuntu Machine’s IP address using terminal and GUI interface. Also, we have taught how to edit or change hostname of a system. If you have any confusion then please let us know through the comment box.